Home and garden haven

🌿 Love your home & garden? You’re going to love what’s inside.
🛠️ From stunning landscaping ideas to cozy upgrades, unlock tips most people miss.
👉 Grab your free access now

Saturday, November 22, 2025

Vintage Christmas Circle Printables – Perfect for Gift Tags, Ornaments, and Handmade Garlands

Vintage Christmas Circle Printables – Perfect for Gift Tags, Ornaments, and Handmade Garlands

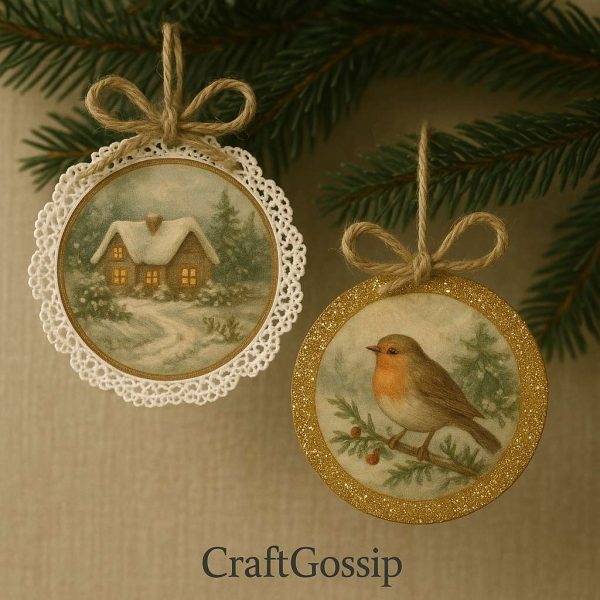
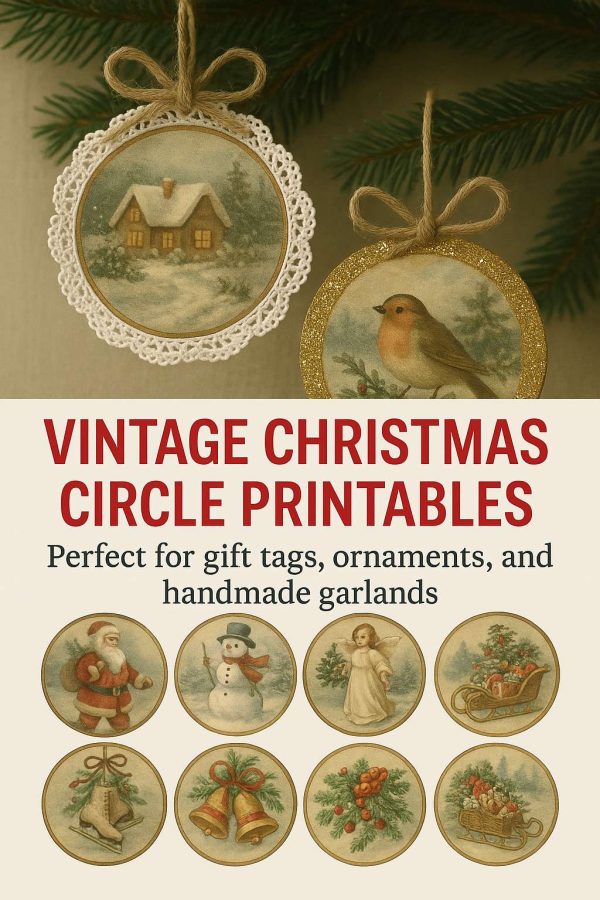
There’s something about vintage Christmas art that just tugs at the heart, isn’t there? The soft colours, the gentle brush strokes, the cosy little scenes… they remind me of the old tins my grandmother kept her sewing supplies in. These printable Christmas circles bring that same nostalgic charm into your holiday crafting—and they’re completely free to download and use.

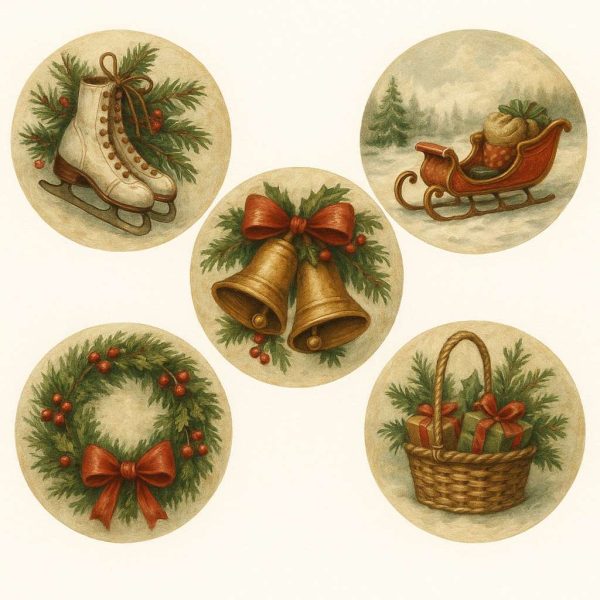
I’ve made two full sets: one with story-book winter scenes (little cottages, snowy paths, the sweetest robin), and another featuring classic Christmas icons like bells, skates, wreaths, and a sleigh packed with gifts. They all print beautifully on plain white card, so you can turn them into all sorts of festive bits and pieces without needing fancy supplies.

Ideas for Using These Vintage Christmas Circles

  1. Christmas Tree Ornaments
    Print on a heavier cardstock, cut them out, and punch a small hole at the top. Add twine, ribbon, lace, or even a tiny scrap of velvet ribbon you’ve tucked away from last year’s gifts. They look gorgeous tucked into the branches, especially if your tree leans toward a traditional or rustic style.
  2. Charming Gift Tags
    The circles are just the right size to turn any wrapped gift into a little moment of magic. Write your To/From on the back, attach with jute string or baker’s twine, and let the artwork do the rest. I’ve already tested them on kraft paper wrapping, and oh my goodness—they pop beautifully.
  3. Vintage Christmas Garlands
    If you’re like me and adore a bit of old-fashioned holiday charm, print a few sheets and turn them into a garland. Simply string them together with ribbon, twine, or skinny lace. Hang it across your mantel, over a window, or drape it across your shelves for an instant cosy Christmas feel.

A Few Embellishing Ideas

I never leave well enough alone during Christmas crafting season, so here are some little extras to try:

  • Lightly brush the outer edge with glitter (antique gold looks incredible)
    Glue a lace edging around each circle
    Add a backing layer—use red cardstock or kraft paper for a more layered, old-world look
    Distress the edges with an ink pad to really lean into that vintage feel
    Pop them onto mini wooden discs for ornaments with a little more weight and texture

They also look lovely clipped onto twine with tiny pegs—think farmhouse Christmas, but gentler and a bit more nostalgic.

Printing Tips

  • Print on A4 or Letter-size white cardstock
    • Set your printer to high-quality or photo mode
    • If you want sturdier ornaments, glue the cutouts onto thin cardboard or a cereal box
    • Laminate if you want them to last year after year


* This article was originally published here


* This article was originally published here

Friday, November 21, 2025

Vintage Christmas Circle Printables – Perfect for Gift Tags, Ornaments, and Handmade Garlands

Vintage Christmas Circle Printables – Perfect for Gift Tags, Ornaments, and Handmade Garlands

There’s something about vintage Christmas art that just tugs at the heart, isn’t there? The soft colours, the gentle brush strokes, the cosy little scenes… they remind me of the old tins my grandmother kept her sewing supplies in. These printable Christmas circles bring that same nostalgic charm into your holiday crafting—and they’re completely free to download and use.

I’ve made two full sets: one with story-book winter scenes (little cottages, snowy paths, the sweetest robin), and another featuring classic Christmas icons like bells, skates, wreaths, and a sleigh packed with gifts. They all print beautifully on plain white card, so you can turn them into all sorts of festive bits and pieces without needing fancy supplies.

Ideas for Using These Vintage Christmas Circles

  1. Christmas Tree Ornaments
    Print on a heavier cardstock, cut them out, and punch a small hole at the top. Add twine, ribbon, lace, or even a tiny scrap of velvet ribbon you’ve tucked away from last year’s gifts. They look gorgeous tucked into the branches, especially if your tree leans toward a traditional or rustic style.
  2. Charming Gift Tags
    The circles are just the right size to turn any wrapped gift into a little moment of magic. Write your To/From on the back, attach with jute string or baker’s twine, and let the artwork do the rest. I’ve already tested them on kraft paper wrapping, and oh my goodness—they pop beautifully.
  3. Vintage Christmas Garlands
    If you’re like me and adore a bit of old-fashioned holiday charm, print a few sheets and turn them into a garland. Simply string them together with ribbon, twine, or skinny lace. Hang it across your mantel, over a window, or drape it across your shelves for an instant cosy Christmas feel.

A Few Embellishing Ideas

I never leave well enough alone during Christmas crafting season, so here are some little extras to try:

  • Lightly brush the outer edge with glitter (antique gold looks incredible)
    Glue a lace edging around each circle
    Add a backing layer—use red cardstock or kraft paper for a more layered, old-world look
    Distress the edges with an ink pad to really lean into that vintage feel
    Pop them onto mini wooden discs for ornaments with a little more weight and texture

They also look lovely clipped onto twine with tiny pegs—think farmhouse Christmas, but gentler and a bit more nostalgic.

Printing Tips

  • Print on A4 or Letter-size white cardstock
    • Set your printer to high-quality or photo mode
    • If you want sturdier ornaments, glue the cutouts onto thin cardboard or a cereal box
    • Laminate if you want them to last year after year


* This article was originally published here

Thursday, November 20, 2025

Create a Stunning Multi-Triangle Wood Shelf – This DIY Project Will Elevate Your Home Decor

Create a Stunning Multi-Triangle Wood Shelf – This DIY Project Will Elevate Your Home Decor

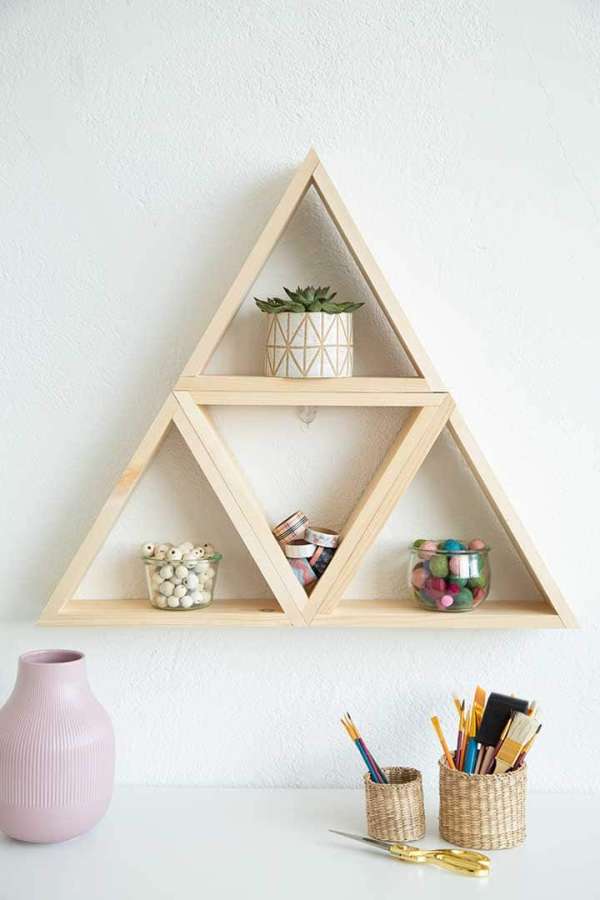
If you’re looking to add a unique and modern touch to your home, this DIY Multi-Triangle Wood Shelf is the perfect project to try! It’s the ideal way to bring a bit of geometric flair and functionality into any room. Whether you’re styling your living room, bedroom, or home office, this sleek and creative shelf design will not only give you extra storage but will also serve as a statement piece in your space.

What’s great about this project is how easy it is to customize! You can make it as big or small as you want, and the clean, angular design will effortlessly complement any decor style. Plus, with simple materials and step-by-step instructions, you’ll have this show-stopping shelf up in no time.

Ready to add some modern charm to your walls? href=”https://www.aliceandlois.com/diy-multi-triangle-wood-shelf/” target=”_new” rel=”noopener” data-start=”886″ data-end=”982″>Check out the full tutorial here! and start building your new favorite decor piece today!

DIY Picture Frame Shelf

How to make a faux clay Arch-shaped shelf

DIY Display Shelf


* This article was originally published here

Monday, November 17, 2025

DIY Decoupaged Robin Charger Plate – A Festive Christmas Craft

DIY Decoupaged Robin Charger Plate – A Festive Christmas Craft

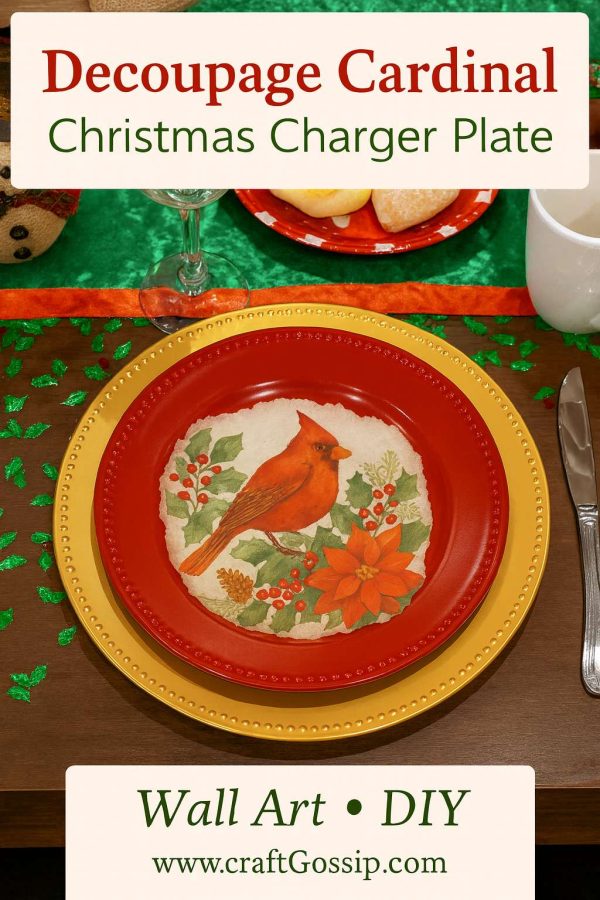
Every holiday season I like to bring out one or two new handmade décor pieces for the house. It’s not about spending a fortune on decorations but rather adding a personal, heartwarming touch. This year’s favorite? A decoupaged robin charger plate made from Dollar Tree finds. Whether you hang it as wall art, use it as a festive dinner charger, or place it in the center of your Christmas tablescape, this project adds that perfect cozy charm to your holiday setting.

Why Robins for Christmas Décor?

Robins (and cardinals, depending on where you live) are often linked with winter and Christmas. Their bright red feathers stand out beautifully against snowy backdrops and symbolize warmth, cheer, and even loved ones watching over us. Pairing the robin motif with poinsettias and holly brings in all the nostalgia and color of a traditional Christmas.

Materials You’ll Need

You only need a few basics for this project, and most can be found at the dollar store or craft stash you already have:

  • 1 Red charger plate (plastic ones from Dollar Tree work perfectly) 
  • 1 Christmas napkin with a robin/cardinal design 
  • Mod Podge (matte or gloss) 
  • Foam brush or soft bristle brush 
  • Scissors 
  • Plastic wrap/cling film (to smooth wrinkles without tearing) 
  • Clear acrylic sealer spray (optional for durability if you’ll use it at the table) 

Step-by-Step Tutorial

Step 1 – Prep Your Plate

Wipe down the charger plate with a damp cloth to remove dust and fingerprints. This ensures your napkin adheres smoothly.

Step 2 – Separate Napkin Layers

Napkins are usually 2–3 ply. Carefully peel away the white backing layers until you’re left with just the printed robin layer. This thinner layer blends beautifully when decoupaged.

Step 3 – Create Torn Edges

Instead of cutting, gently tear around the robin and poinsettia design. Torn edges help the napkin blend more naturally into the plate, giving that charming “soft edge” effect instead of harsh cut lines.

Step 4 – Apply Mod Podge

Brush a thin coat of Mod Podge onto the center of the charger where the design will sit. Work quickly but evenly.

Step 5 – Place the Napkin

Lay the napkin down gently, starting at one edge and smoothing as you go. Place cling wrap on top, then use your fingers to gently press out wrinkles and bubbles without ripping the delicate napkin.

Step 6 – Seal the Design

Brush another coat of Mod Podge over the top of the napkin, working from the center outwards. Allow to dry completely, then apply a second coat for protection.

Step 7 – Optional Protective Seal

If you’ll be using your charger plate at the dinner table, spray with a clear acrylic sealer to protect it from spills and stains. (Remember, these are decorative only—don’t serve food directly on them.)


* This article was originally published here
Sunday, November 16, 2025

No-Sew Primitive Drop Cloth Gingerbread Men – Easy Rustic Christmas Craft

No-Sew Primitive Drop Cloth Gingerbread Men – Easy Rustic Christmas Craft

There’s something wonderfully nostalgic about primitive Christmas decorations. The soft, timeworn fabrics, the slightly imperfect shapes, and that cozy handmade charm that looks like it came straight out of Grandma’s attic. This DIY project takes the classic primitive gingerbread man and makes it even easier—no sewing required!

If you can wield a glue gun, you can whip up these cuties in an afternoon. They’re perfect for hanging on your tree, tucking into wreaths, or giving as heartfelt handmade gifts.

Why You’ll Love This No-Sew Version

  • Faster than sewing – you can make a whole batch in under an hour

  • Perfect for beginners or kids with supervision

  • Still keeps that rustic, primitive charm

  • Great way to use up fabric scraps or drop cloth leftovers

Supplies You’ll Need

  • Pre-washed drop cloth or plain cotton fabric (coffee-stained or tea-dyed for a primitive look)

  • Gingerbread man template (hand-drawn or printed – around 6–7 inches tall works well)

  • Fabric scissors or pinking shears for a rustic edge

  • Hot glue gun & glue sticks

  • Polyester fiberfill or cotton stuffing

  • Brown acrylic paint or fabric paint

  • Small paintbrush or sponge

  • Embellishments: mini buttons, ribbon scraps, twine, or lace

  • White paint pen or puff paint for “icing” details

  • Sandpaper (optional, for distressing edges)

Step-by-Step Instructions

Step 1 – Prep Your Fabric

Wash and dry your drop cloth to soften it up. For an extra-primitive look, stain the fabric with strong coffee or tea and let it dry naturally. Iron if needed.

Step 2 – Cut Out Your Gingerbread Shape

Trace your template onto the drop cloth twice for each gingerbread man (front and back). Cut out both pieces using regular scissors or pinking shears for a jagged edge.

Step 3 – Glue the Edges

Place your two fabric pieces together, wrong sides facing in. Run a thin bead of hot glue around the edge, leaving a 1–2 inch opening at the bottom for stuffing. Press the edges together firmly as you go.

Tip: Work in small sections so the glue doesn’t dry before you press the fabric together.

Step 4 – Stuff Your Gingerbread

Use a pencil or chopstick to gently push the stuffing into the arms, legs, and head first, then fill the body. You want them plump but still soft.

Step 5 – Seal Him Up

Glue the opening closed and press until set.

Step 6 – Add the Primitive Look

Lightly dry-brush brown paint over the fabric for that baked, rustic tone. Let it dry. If you want an even more aged look, lightly sand the edges once the paint is dry.

Step 7 – Decorate

Glue on tiny buttons, tie a bow from twine or lace, and add white paint pen “icing” details along the arms, legs, and head.

Display Ideas

  • Hang with twine on your Christmas tree

  • Add to a holiday wreath

  • Tie onto wrapped gifts as a keepsake tag

  • Cluster in a wooden bowl with greenery for a table centerpiece

Crafty Tip: Make a batch of these gingerbread men in different sizes and shades of drop cloth to create a whole primitive cookie family.

This no-sew method keeps all the rustic character but makes the project quick, easy, and beginner-friendly. You’ll have your own tray of “cookies” ready to display before the kettle’s boiled for your second cup of tea.


* This article was originally published here


* This article was originally published here
Fine Motor Task Cards for Kids

I don’t know why Pinterest just suddenly decided I needed to see all the content about task cards and task boxes for kids, but these ideas ...