
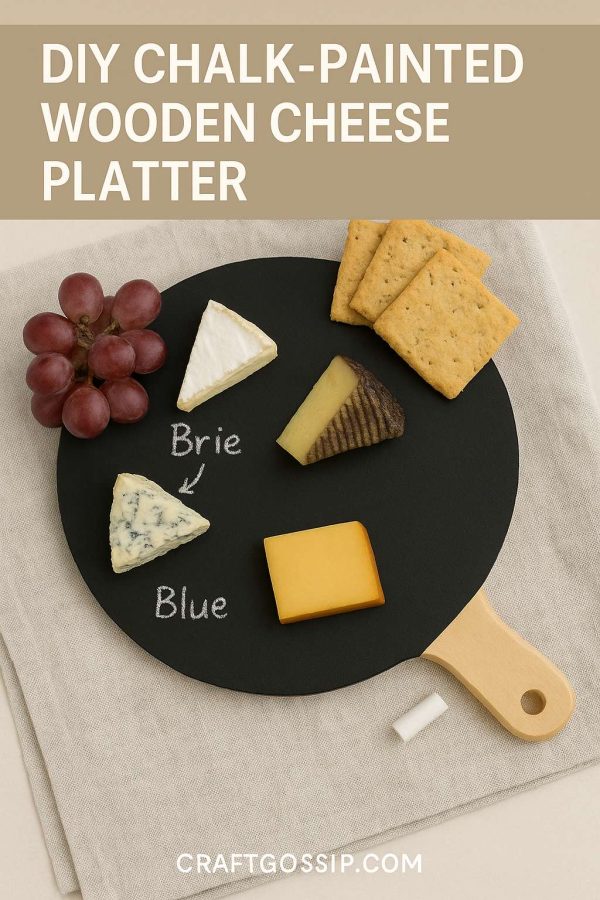
There’s something extra special about serving cheese and nibbles on a board that you’ve customized yourself. This chalk-painted wooden platter board not only looks beautiful but also lets you write directly on it—labeling cheeses, doodling arrows toward crackers, or even leaving a cheeky little message for your guests.
It’s an easy weekend project that transforms a plain wooden board into a conversation starter at your next gathering.
Supplies You’ll Need
- A wooden platter board or cutting board (unfinished wood works best)
- Chalk paint (black or slate gray works beautifully)
- Soft bristle paintbrush or foam brush
- Painter’s tape (optional, if you want to keep the edges natural)
- Fine-grit sandpaper (220 grit works well)
- Food-safe clear wax or sealant (look for a non-toxic, food-grade option)
- Chalk sticks or chalk markers
Step-by-Step Tutorial
Step 1: Prep Your Board
Start with a clean, dry wooden board. If it’s rough or coated with any varnish, give it a light sanding with fine-grit sandpaper. Wipe away dust with a damp cloth and let dry.
Step 2: Tape Off the Edges (Optional)
If you’d like to keep the edges or handle natural wood for a two-tone look, apply painter’s tape around those areas. This gives a really nice rustic finish.
Step 3: Paint It Up
Using your brush, apply a thin, even coat of chalk paint across the surface of the board. Let it dry according to the paint instructions (usually about 30–60 minutes). Apply a second coat for full coverage.
Step 4: Season the Chalkboard Surface
Once the paint is fully dry, rub a stick of chalk on its side over the entire painted surface. Wipe off with a soft cloth. This “conditions” the surface and prevents ghost outlines later when you erase markings.
Step 5: Seal & Protect
If you want to make your platter food-safe, apply a thin coat of food-grade wax or sealant over the painted surface. Buff lightly once dry. This step is optional, but it helps keep the chalk paint finish looking fresh after multiple uses.
Step 6: Label & Serve
Now comes the fun part! Lay out your cheese and snacks, then use chalk to label each item directly on the board. Think “Brie →” or “Smoked Cheddar” with doodled arrows and swirls. When you’re done, simply wipe clean with a damp cloth and reuse.
Tips & Ideas
- Use colored chalk markers for a fancier look (especially fun around holidays).
- Keep a small jar of chalk next to the platter so guests can doodle too.
- For extra flair, pair your chalkboard platter with rustic twine-wrapped cheese knives.
- Don’t limit it to cheese—use for antipasto, dessert platters, or even taco night toppings!
* This article was originally published here
No comments:
Post a Comment