
Home and garden haven

🌿 Love your home & garden? You’re going to love what’s inside.
🛠️ From stunning landscaping ideas to cozy upgrades, unlock tips most people miss.
👉 Grab your free access now

Sunday, October 12, 2025

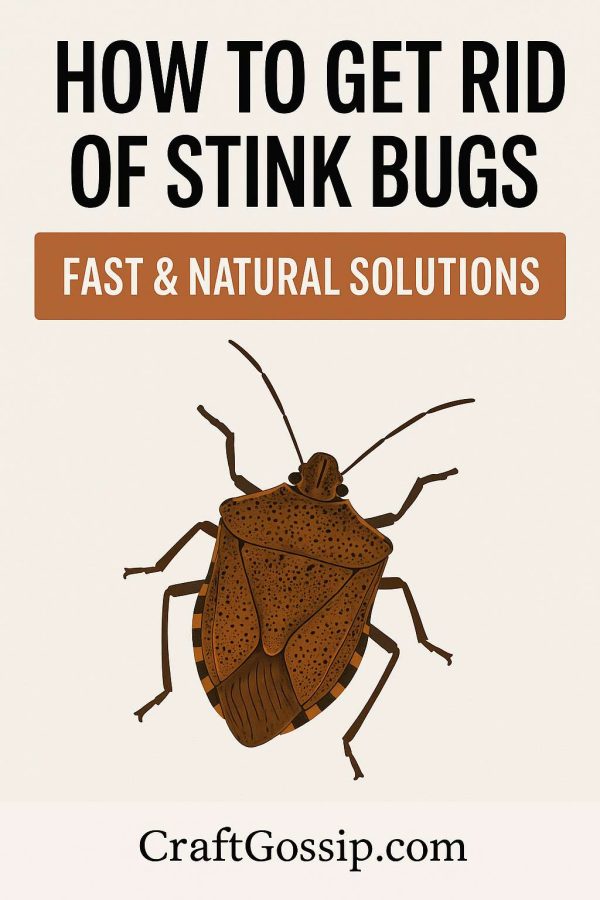
How to Get Rid of Stink Bugs – Natural and Effective Solutions for Your Home

How to Get Rid of Stink Bugs – Natural and Effective Solutions for Your Home

If you’ve ever had the misfortune of squishing a stink bug in your home, you know exactly where they get their name from. That pungent, sharp odor lingers in the air and on your hands far longer than you’d like. Around autumn, when the weather turns cool, these little invaders start looking for warm places to overwinter—unfortunately, that often means your living room, kitchen, or even your bedroom.

The good news? You don’t have to suffer through a stink bug invasion. With a mix of prevention and safe remedies, you can send them packing without leaving your home smelling like a chemistry experiment.

Why Do Stink Bugs Come Inside?

Stink bugs are drawn to the warmth and light of homes as the weather cools. They slip through the tiniest cracks around windows, doors, siding, and even attic vents. Once inside, they like to gather on sunny walls or near light sources. Unlike termites or roaches, they don’t damage your home or spread disease—but their smell and sheer numbers are enough to make anyone crazy.

Prevention First: Seal and Block Entry Points

The easiest way to handle stink bugs is to stop them from entering in the first place. Think of it like winterizing your house but with pests in mind.

  • Seal cracks and gaps: Use caulk or weatherstripping around windows, doors, and siding. Pay attention to the attic, crawl spaces, and around chimneys. 
  • Repair screens: Even a small tear in a window or door screen is an open invitation. 
  • Close off vents: Add fine mesh over attic vents or other exterior openings. 
  • Switch exterior lighting: Stink bugs love light. Use yellow “bug lights” outdoors to reduce attraction. 

How to Get Rid of Stink Bugs Already Inside

1. Vacuum Them Up

The quickest way to collect stink bugs without smashing them is with a vacuum. The trick? Use a vacuum with a disposable bag. After collecting, seal the bag in a plastic trash bag and put it outside. Otherwise, your vacuum might smell for weeks.

2. Soapy Water Trap

Fill a bucket or wide bowl with warm water and a few drops of dish soap. Place it under a light source (like a desk lamp). Stink bugs are attracted to the light, fall into the soapy water, and drown without releasing their odor.

3. DIY Sticky Traps

Wrap a piece of cardboard or old cereal box in double-sided tape. Place it near windowsills where stink bugs gather. Once stuck, dispose of the whole thing in the trash.

4. Essential Oil Spray

Stink bugs dislike strong scents like mint, neem, and citrus oils. Mix 10–15 drops of essential oil with 2 cups of water and a splash of white vinegar. Spray on window frames, doors, or directly on the bugs. It repels without harsh chemicals.

5. Wipe with Vinegar Solution

Wiping down window sills and door frames with a vinegar-water mix removes scent trails that attract more bugs. It also deters them from coming back to the same spot.

What Not to Do

  • Don’t squash them – unless you enjoy the lingering smell. 
  • Don’t use heavy pesticides indoors – stink bugs are resistant to many chemicals, and spraying your living room usually does more harm than good. 
  • Don’t ignore them – one or two quickly turn into a dozen if you leave them be. 

Natural Predators in the Garden

If stink bugs are a problem outside as well, encourage natural predators like birds, spiders, and praying mantises. Planting marigolds or chrysanthemums can also help repel them naturally.

A Seasonal Routine That Works

Each autumn, before the first cold snap, do a quick “bug check” around your home. Seal cracks, set up a soapy water trap or two, and keep a vacuum ready. By spring, you’ll thank yourself for avoiding a full-on infestation.

 Getting rid of stink bugs doesn’t require toxic sprays or endless frustration. A little prevention plus a few clever, natural solutions will have you reclaiming your home in no time—and with fresher smelling air too.


* This article was originally published here


* This article was originally published here

Saturday, October 11, 2025

How to Get Rid of Stink Bugs – Natural and Effective Solutions for Your Home

How to Get Rid of Stink Bugs – Natural and Effective Solutions for Your Home

If you’ve ever had the misfortune of squishing a stink bug in your home, you know exactly where they get their name from. That pungent, sharp odor lingers in the air and on your hands far longer than you’d like. Around autumn, when the weather turns cool, these little invaders start looking for warm places to overwinter—unfortunately, that often means your living room, kitchen, or even your bedroom.

The good news? You don’t have to suffer through a stink bug invasion. With a mix of prevention and safe remedies, you can send them packing without leaving your home smelling like a chemistry experiment.

Why Do Stink Bugs Come Inside?

Stink bugs are drawn to the warmth and light of homes as the weather cools. They slip through the tiniest cracks around windows, doors, siding, and even attic vents. Once inside, they like to gather on sunny walls or near light sources. Unlike termites or roaches, they don’t damage your home or spread disease—but their smell and sheer numbers are enough to make anyone crazy.

Prevention First: Seal and Block Entry Points

The easiest way to handle stink bugs is to stop them from entering in the first place. Think of it like winterizing your house but with pests in mind.

  • Seal cracks and gaps: Use caulk or weatherstripping around windows, doors, and siding. Pay attention to the attic, crawl spaces, and around chimneys. 
  • Repair screens: Even a small tear in a window or door screen is an open invitation. 
  • Close off vents: Add fine mesh over attic vents or other exterior openings. 
  • Switch exterior lighting: Stink bugs love light. Use yellow “bug lights” outdoors to reduce attraction. 

How to Get Rid of Stink Bugs Already Inside

1. Vacuum Them Up

The quickest way to collect stink bugs without smashing them is with a vacuum. The trick? Use a vacuum with a disposable bag. After collecting, seal the bag in a plastic trash bag and put it outside. Otherwise, your vacuum might smell for weeks.

2. Soapy Water Trap

Fill a bucket or wide bowl with warm water and a few drops of dish soap. Place it under a light source (like a desk lamp). Stink bugs are attracted to the light, fall into the soapy water, and drown without releasing their odor.

3. DIY Sticky Traps

Wrap a piece of cardboard or old cereal box in double-sided tape. Place it near windowsills where stink bugs gather. Once stuck, dispose of the whole thing in the trash.

4. Essential Oil Spray

Stink bugs dislike strong scents like mint, neem, and citrus oils. Mix 10–15 drops of essential oil with 2 cups of water and a splash of white vinegar. Spray on window frames, doors, or directly on the bugs. It repels without harsh chemicals.

5. Wipe with Vinegar Solution

Wiping down window sills and door frames with a vinegar-water mix removes scent trails that attract more bugs. It also deters them from coming back to the same spot.

What Not to Do

  • Don’t squash them – unless you enjoy the lingering smell. 
  • Don’t use heavy pesticides indoors – stink bugs are resistant to many chemicals, and spraying your living room usually does more harm than good. 
  • Don’t ignore them – one or two quickly turn into a dozen if you leave them be. 

Natural Predators in the Garden

If stink bugs are a problem outside as well, encourage natural predators like birds, spiders, and praying mantises. Planting marigolds or chrysanthemums can also help repel them naturally.

A Seasonal Routine That Works

Each autumn, before the first cold snap, do a quick “bug check” around your home. Seal cracks, set up a soapy water trap or two, and keep a vacuum ready. By spring, you’ll thank yourself for avoiding a full-on infestation.

 Getting rid of stink bugs doesn’t require toxic sprays or endless frustration. A little prevention plus a few clever, natural solutions will have you reclaiming your home in no time—and with fresher smelling air too.


* This article was originally published here

Friday, October 10, 2025

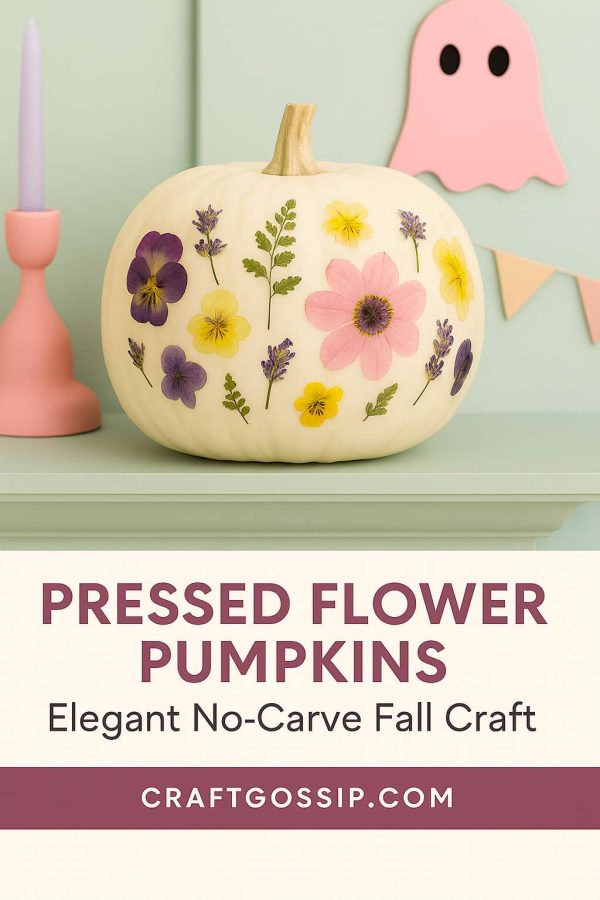
Pressed Flower Pumpkins – No-Carve Fall Décor You’ll Want to Keep Year-Round

Pressed Flower Pumpkins – No-Carve Fall Décor You’ll Want to Keep Year-Round

Every October, I start out with big pumpkin-carving dreams… and end up knee-deep in seeds, pulp, and regret. This year, I’ve gone for something softer — and much prettier — with these Pressed Flower Pumpkins.

They’re the perfect no-carve alternative for anyone who loves handmade beauty but not the mess. Each one looks like a little piece of cottage-core art — elegant, eco-friendly, and surprisingly easy to make.

(Keywords: pressed flower pumpkins, no carve pumpkin ideas, fall crafts, sustainable Halloween décor, botanical pumpkins)

What You’ll Need

  • Small white pumpkins (real or faux)

  • Pressed flowers or leaves — you can buy pre-pressed florals here on Amazon or make your own

  • Mod Podge or decoupage glue

  • Soft brush or foam brush

  • Tweezers for delicate placement

  • Paper towel or soft cloth for smoothing

  • Optional: Clear acrylic spray sealer for extra shine

Step-by-Step Tutorial

Step 1: Clean & Prep

Wipe your pumpkin clean and let it dry. Real pumpkins should be free from dirt and moisture — faux pumpkins can just be dusted.

White or cream pumpkins show off flower colors beautifully, but you can experiment with pale pink or even sage green for a modern look.

Step 2: Plan Your Layout

Arrange your pressed flowers on the pumpkin before gluing. Cluster 3–5 small blooms together, mix in greenery, and vary your placement around the curves for a balanced, natural feel.

Think of your pumpkin as a canvas — every side deserves a bit of love.

Step 3: Apply the Flowers

Brush a thin layer of Mod Podge where you want your first flower.
Use tweezers to gently lift the flower into place.
Carefully brush another light coat over the top, smoothing outward from the center.

If any bubbles appear, dab gently with your fingertip or a soft cloth. Avoid dragging — those petals are delicate!

Step 4: Seal & Shine

Let the pumpkin dry for about 30 minutes. Apply one more coat of Mod Podge over the entire pumpkin to seal your work.

If you want a more durable or glossy finish, add a mist of clear acrylic spray after it’s fully dry.

Step 5: Style Your Display

Display your finished pumpkins on the mantel, entryway table, or as a dining centerpiece. Add a few dried leaves, fairy lights, or mini gourds to complete the cozy autumn vibe.

These also make beautiful hostess or teacher gifts — tie a small kraft tag around the stem with a bit of twine.

How to Press Your Own Flowers

If you’d like to create your own pressed flowers, here’s the quick method:

  1. Select small, flat blooms like pansies, daisies, ferns, or violas.

  2. Lay them between two sheets of parchment paper inside a heavy book.

  3. Stack additional books (or a brick) on top.

  4. Wait 7–10 days for them to fully dry.

  5. Store between wax paper sheets until ready to use.

Why You’ll Love This Craft

  • No knives or mess — it’s completely no-carve.

  • Safe and easy for kids, seniors, or anyone with limited mobility.

  • Perfect for eco-conscious crafters.

  • Doubles as both Halloween and Thanksgiving décor.

CraftGossip Tip

Try this craft with faux pumpkins if you want to keep your design year after year. They store beautifully and make a charming addition to a pastel Halloween mantle or autumn centerpiece.


* This article was originally published here
Thursday, October 9, 2025

How to save money and avoid headaches when buying new windows

New windows reduce drafts and noise, and they are easier to clean. But they aren’t cheap. These tips will help you shop wisely.

* This article was originally published here

Tuesday, October 7, 2025

DIY Friday the 13th Halloween Wreath – A Spooky Door Statement

DIY Friday the 13th Halloween Wreath – A Spooky Door Statement

If you’re looking to up the scare factor this October, our sister site CraftBits has a project that’s perfect for horror fans. Their DIY Friday the 13th Halloween Wreath is a chilling nod to the classic slasher film, and it’s guaranteed to give your front door some serious fright-night vibes.

This isn’t your everyday pumpkin-and-cobweb wreath. Instead, the tutorial shows you how to create a bold, eerie wreath featuring Jason’s signature hockey mask at its center. Add in some creepy accents—fake blood, knives, spiders, or dark florals—and you’ve got a Halloween decoration that looks straight out of a haunted movie set.

What I love most about this wreath is that it’s easy to make but packs a huge punch. You only need a handful of supplies, most of which can be picked up at the dollar store or a discount craft shop. The step-by-step tutorial makes it beginner-friendly, so you don’t need advanced crafting skills to create something truly spine-chilling.

Whether you’re a die-hard Friday the 13th fan or just want your Halloween porch décor to stand out from the usual bats and pumpkins, this wreath will definitely get noticed (and maybe even make the neighbors jump!).

Check out the full tutorial here: DIY Friday the 13th Halloween Wreath – CraftBits


* This article was originally published here

Monday, October 6, 2025

DIY Spooky Monster Book with Realistic Eyes

DIY Spooky Monster Book with Realistic Eyes

Every Halloween, our inbox fills up with one big question: “How do you make that creepy book with the eye?” The good news is—it’s way easier than it looks. With a thrifted book, some glue, and a realistic glass eye (yes, really), you can create your very own spooky spellbook straight out of a haunted library.

This is a perfect recycled craft for Halloween décor, themed parties, or even as a quirky prop for your bookshelf.

Supplies You’ll Need

  • An old hardcover book (thrift stores are perfect hunting grounds)

  • Sharp craft knife or box cutter

  • Realistic glass or resin eye cabochon (the more lifelike, the better!)

  • PVA glue or Mod Podge

  • Small paintbrush

  • Black or dark brown paint (optional, for aging edges)

  • Heavyweight object (like another big book) for pressing

Step-by-Step Tutorial

Step 1: Prep Your Book

Choose a hardcover book you don’t mind cutting into. Thicker is better—it gives your eye socket more depth.

Step 2: Mark the Eye Socket

Decide where you want the eye to “peek out” from the book. A centered placement feels creepy and intentional, while an off-center eye gives more of a possessed journal vibe. Trace a circle just a little larger than your glass eye.

Step 3: Cut the Circle

Using a sharp craft knife, carefully cut through the cover and into several pages beneath. You don’t need to go too deep—just enough to nestle your glass eye so it sits snugly. Go slowly and keep your fingers well out of the blade’s path.

Step 4: Secure the Pages

Once your socket is cut, brush PVA glue along the outside edges of the book to hold the pages together. Press the book under a heavy weight until the glue sets (a few hours or overnight works best). This keeps the pages from shifting around.

Step 5: Glue in the Eye

Pop your glass eye into the cutout and glue it firmly in place. Let dry completely.

Step 6: Add Spooky Finishing Touches

For extra eerie detail, brush the page edges with diluted black or brown paint for an aged, smoky effect. You can also glue on strips of fabric, faux leather, or hot-glued “wrinkles” to give your book more texture.

Tips for the Best Results

  • The quality of the eye makes all the difference! Cheap stickers won’t have the same impact as a glass or resin cabochon. Look for realistic ones with depth and light reflection.

  • Don’t skip pressing the book under a heavy object while the glue dries—it keeps the pages crisp and clean.

  • Layer in extra details like fake blood drips, cobwebs, or even stitched binding for a more dramatic prop.


* This article was originally published here

Book Review: Stitch Alphabets & Numbers

I came across a post recently from Lord Libidan wondering about where all the good cross stitch alphabets have gone. While you can find lot...